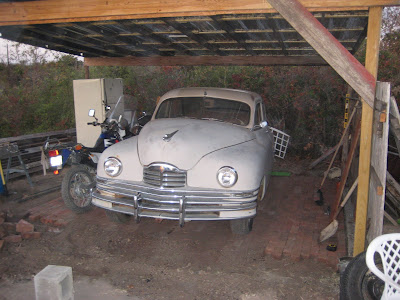
Concrete would have cost nearly $500 just for a half truck of "mud"..not to mention forms, rebar, labor to pour and finish...when I have all these bricks FREE.!!
Nephew Joe did the tractor work and brick loading on Sat/Sunday. Then Monday I got "Jackie" out to handle finishing up the brick placment.
 Let's see...32 cubes of brick...each cube has a tad under 500 bricks...so what's that 16K bricks?
These were left over from an apt const job I was managing back in 1995. They had planned to install a long, high-dollar brick privacy fontage screen wall, and these bricks are special order to match the original phase one bricks (we were adding 120 units for phase II project to match in looks/etc), I ordered the bricks early in the job, due to a long lead time. By the time we were framed up and started brick work, the development dept decided "no fence"...we could not get credit for the over order of bricks...and we did not have any storage area for saving the extra materials. (Big REIT public-held company that wasted $$ like no tomorrow that I worked for). We had to pay for them to complete the purchase order...so I had these last 2 truckloads shipped out to my 3 acres west of DFW.. instead of telling the brick supplier to "keep 'em".
These are "wood mold" bricks, and somewhat irregular in shape. Not the standard wire-cut neat longer bricks we see mostly nowdays. Made via the old method when they used wooden carved molds. No round holes in these bricks, just square tapered holes on bottom side called "frogging" for some reason...at least the brick salesman explained it to me like that.
 Joe loaded the bucket as full as he could, then drove to the Pack/Shack and dumped them. I started a few bricks Sunday afternoon...

 Jackie showing progress made.


6 comments:
OK, tip from the guys who put in my natural stone patio. After they got the stones set in place. They poured sack crete along all the joints and cracks. Then with a soft broom, swept away the stuff on top. Then sprayed the whole thing with water. The concert set up and held everything in place.
Looks stunning - and I bet the Packard is happy to finally have a home :)
Agree with Ben in Texas - you'll need some sort of barrier to prevent weeds / grass from rowing between the bricks - as well as along the edge of the paving where it meets the grass. Perhaps there you could put a concrete barrier?
I'll third BiT and Dani's suggestion, but would have also added a thin layer of dry Portland cement raked in to the native soil then leveled. That gives a good base for the bricks and the ground moisture hardens the base after a while. Looks like its too late for that now unless you really want to give Jackie a workout. ;)
Yep, Ben...the final finish is to be a sprinkling of Sackrete Mortar mix (no gravel) broomed over the bricks and swept in, followed by wetting with water. AND later also, forms set around edges and concrete poured to hold bricks from spreading.
I do have four 80# sacks of Fly Ash (cement-making byproduct) and coulda/shoulda used that raked into the native soil...but too late now.! Oh...not too worried, we have a thick shelf of limestone about a foot below this level all around my place. No shifting/swelling expected.
Thanks all.
B'feets
You are lucky to have free labor. Looking good.
labor's not free...but close to it, and I have to be the taxi for them...and Jackie requires constant beer supply for free as well as $30-40 at the end of the day.
B'foot
Post a Comment